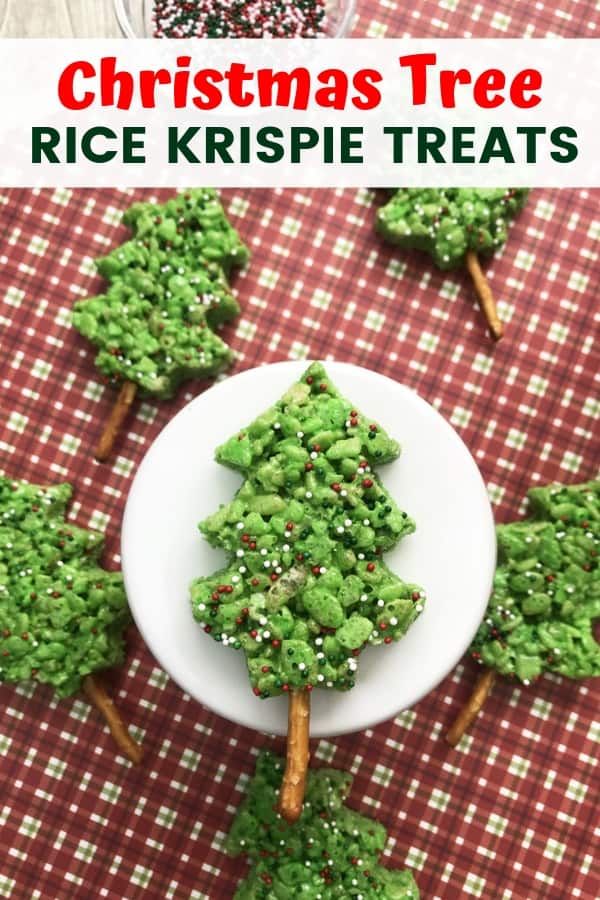
Easy No-Bake Christmas Tree Rice Krispies Treats for Holidays
The holiday season is a magical time, filled with warmth, family, and of course, delicious treats! While elaborate baking projects can be a joy, sometimes you need a festive dessert that's quick, easy, and guarantees smiles all around. Enter: Christmas Tree Rice Krispies Treats! These adorable, no-bake delights are not only simple to make but also incredibly fun to decorate, making them a perfect activity for kids and adults alike. Forget the oven and dive into the joyful world of these green, glittering, edible Christmas trees!
Whether you're looking for a charming addition to your holiday dessert table, a sweet gift for neighbors, or a fun afternoon craft with the little ones, these Christmas Tree Rice Krispies Treats tick all the boxes. Their vibrant green hue, coupled with playful decorations, instantly brings the spirit of Christmas to life. Plus, being a no-bake recipe, they're perfect for busy schedules and kitchens packed with other holiday cooking.
Why Christmas Tree Rice Krispies Treats Are a Holiday Must-Have
There's a reason why Christmas Tree Rice Krispie Treats have become such a beloved holiday staple. Beyond their undeniable cuteness, they offer several compelling advantages:
- No-Bake Brilliance: Free up your oven for roasts and pies! These treats require no baking, making them an excellent choice when kitchen space is at a premium.
- Kid-Friendly Fun: From mixing the sticky marshmallow goodness to shaping and decorating, children absolutely adore getting involved in making these treats. It's a fantastic sensory experience and a wonderful way to create lasting holiday memories.
- Customizable Creativity: The possibilities for decoration are endless! Whether you opt for simple sprinkles or intricate icing designs, each tree can be a unique masterpiece.
- Quick & Easy: In under an hour (plus cooling time), you can have a whole forest of edible Christmas trees ready to dazzle your guests.
- Portable & Shareable: Perfect for school parties, potlucks, or gifting, these treats travel well and are always a welcome sight.
Crafting Your Christmas Tree Rice Krispies Treats: Homemade vs. Pre-Made
You have two main paths to creating your festive Rice Krispies trees: making them from scratch or using pre-made bars. Both methods yield delightful results, with one offering more control over ingredients and the other prioritizing speed and convenience.
Method 1: Homemade From Scratch (Our Preferred Method for Best Results)
Making your Rice Krispies treats from scratch ensures the freshest, chewiest, and most delicious outcome. Plus, it gives you complete control over the green tint!
Ingredients You'll Need:
- 4 ⅔ cups Rice Krispies cereal
- 10 ounces marshmallows (about 40 regular or 6 cups mini marshmallows – mini melt faster and more evenly)
- 4 tablespoons salted European butter (the higher fat content in European butter often gives a richer flavor and chewier texture, but any salted butter works)
- Green food coloring (gel food coloring provides a more vibrant, concentrated color without adding excess liquid)
- Mini Reese's Peanut Butter Cups (for tree trunks)
- Confectioner's sugar (powdered sugar) for dusting "snow" (optional)
- Star sprinkles or small star candies (for tree toppers)
- Assorted small candies or sprinkles for decoration
Equipment Essentials:
- Large microwave-safe bowl (if using microwave method) or large saucepan (for stovetop)
- Spatula (preferably silicone, as it's less sticky)
- Baking tray or cookie sheet
- Parchment paper or wax paper
- Non-stick cooking spray (a must for easy cleanup!)
- Mesh strainer (optional, for powdered sugar "snow")
Step-by-Step Homemade Instructions:
- Prep Your Workspace: Line a baking tray with parchment paper or wax paper and set aside. Lightly spray your large mixing bowl and spatula with non-stick cooking spray. Add the Rice Krispies cereal to the greased bowl.
- Melt Marshmallows & Butter:
- Microwave Method: In a separate large microwave-safe bowl, combine the butter and marshmallows. Heat on high for 1 minute. Stir well. Heat for an additional 15-30 seconds if needed, then let the bowl sit in the microwave for a minute using residual heat to fully melt. Stir until completely smooth.
- Stovetop Method: In a large saucepan, melt butter over medium-low heat. Once about half melted, add marshmallows. Stir continuously until most marshmallows are melted. Remove from heat and continue stirring vigorously until the mixture is perfectly smooth. This prevents scorching and ensures a consistent texture.
- Tint Green: Stir in several drops of green food coloring to the melted marshmallow mixture until you achieve your desired vibrant Christmas tree green. Start with a few drops and add more gradually.
- Combine & Mix: Pour the green marshmallow mixture over the cereal in the prepared bowl. Using your greased spatula, mix very well until the cereal is evenly coated. Work quickly but gently.
- Shape Your Trees: Once the mixture is cool enough to handle (but still pliable), scoop out about ½ cup of the mixture per tree. Using lightly greased hands, gently pat and shape the mixture into a rough pyramid or triangle shape. Don't press too firmly, or your treats will be dense and hard. Place each shaped tree onto your parchment-lined baking tray. You should yield about 10-12 trees.
- Chill & Refine: Chill the shaped treats for about 10 minutes. This makes them much easier to handle and refine. After chilling, reshape them to perfect their triangle form and allow them to firm up completely on the tray for about 40 more minutes at room temperature, or a little longer in the fridge if you're in a hurry.
Method 2: Using Pre-Made Rice Krispies Treats Bars
For ultimate speed and minimal fuss, starting with store-bought Rice Krispies Treats Original bars is a fantastic option. This method focuses purely on the fun of shaping and decorating!
What You'll Need:
- 8 Kellogg's® Rice Krispies Treats® Original bars
- Green frosting (store-bought or homemade)
- Assorted sprinkles, small candies, or edible glitter
- 4 miniature chocolate-covered peanut butter cups, halved vertically (or small pretzel sticks)
- Parchment-lined baking sheet
- Knife and cutting board
- Piping bag with a star tip (or a plastic sandwich bag with a corner snipped off)
Step-by-Step Pre-Made Instructions:
- Unwrap & Trim: Unwrap each Kellogg’s® Rice Krispies Treats® Original bar. Place them on your parchment-lined baking sheet. Use a sharp knife to carefully trim the corners of each rectangular treat, creating distinct triangle shapes reminiscent of Christmas trees.
- Frost Your Trees: Fill your piping bag fitted with a star tip (or a sandwich bag with a small corner cut off) with green frosting.
- For a classic star-tip look, pipe a row of frosting across the bottom of each tree. Then, pipe the next row slightly overlapping the first. Continue this fanning pattern until the entire tree is covered in green frosting.
- Alternatively, spread the frosting smoothly over the entire surface of the triangle using a butter knife or small offset spatula.
- Decorate with Dazzle: While the frosting is still soft, gently press your chosen sprinkles, mini candies (like M&Ms or edible pearls), or edible glitter into the frosting to create "ornaments."
- Add the Trunk: For the tree trunk, gently press one halved miniature chocolate-covered peanut butter cup (cut side facing down for stability) into the bottom center of each frosted tree. Alternatively, use a small pretzel stick.
Dazzling Decoration Ideas & Creative Twists
This is where the magic truly happens! Turning a simple triangle of Rice Krispies treat into a festive Christmas tree is incredibly satisfying. Get inspired by these ideas, and don't be afraid to experiment!
Classic & Cozy Decorations:
- "Snow" Dusting: For a simple, elegant touch, place a mesh strainer over your decorated trees and gently tap a spoonful of confectioner's sugar through it. This creates a beautiful, snowy effect.
- Star Toppers: A star sprinkle or a small piece of star-shaped candy is the quintessential tree topper. Position it proudly at the apex of each tree.
- Ornament Candies: Use small, round candies like mini M&Ms, edible pearls, silver dragees, or even cut-up gummy candies as colorful ornaments.
- Icing Garland: Use contrasting icing colors (white, red, or silver) in a piping bag with a thin round tip to pipe zig-zag "garlands" across your trees.
Unique & Playful Embellishments:
- Chocolate Drizzle: Melt some white or dark chocolate and drizzle it artfully over the green frosting for an extra layer of flavor and visual appeal.
- Coconut Snow: For a different kind of snow, lightly press shredded coconut onto a layer of white frosting on your trees.
- Edible Glitter: A sprinkle of edible green, silver, or gold glitter can make your trees truly sparkle.
- Candy Cane Bits: Crush up a few candy canes and sprinkle the pieces over the frosting for a minty crunch and festive look.
- Miniature Lights: Use tiny colorful sugar pearls or nonpareils to mimic strings of fairy lights.
For more detailed and elaborate decoration inspiration, including how to make these treats extra special for gifting, check out our guide on DIY Christmas Tree Rice Krispie Treats: Decorate with Fun Candies.
Tips for Rice Krispies Treat Success
Even though these are "easy" no-bake treats, a few expert tips can ensure your Christmas Tree Rice Krispies Treats turn out perfectly every time:
- Grease Generously: This cannot be stressed enough! Whether it's your bowl, spatula, or hands, a good coating of non-stick cooking spray will prevent sticking and make the process much smoother.
- Fresh Marshmallows Are Key: Old or stale marshmallows won't melt as smoothly and can result in a hard, difficult-to-chew treat. Always use fresh marshmallows for the best texture.
- Don't Overcook Marshmallows: If using the stovetop, remove the pan from heat just before all marshmallows are fully melted and continue stirring. Overheating can make them stiff. For the microwave, use short bursts.
- Work Quickly: The marshmallow mixture becomes less pliable as it cools. Have all your ingredients and tools ready, and work efficiently when mixing and shaping.
- Gentle Shaping: When pressing the mixture into shapes, use light pressure. Compressing them too much will lead to dense, hard treats instead of soft and chewy ones.
- Proper Storage: Store your finished treats in an airtight container at room temperature for up to 3-4 days. For longer storage, you can freeze them for up to 6 weeks. Thaw at room temperature before serving.
Conclusion: Bring Joy Home This Holiday Season
These Easy No-Bake Christmas Tree Rice Krispies Treats are more than just a dessert; they're an experience. They offer a delightful blend of simplicity, festive charm, and deliciousness that perfectly captures the spirit of the holidays. Whether you choose the homemade path or opt for the convenience of pre-made bars, the joy of crafting and decorating these edible trees is immeasurable. So, gather your ingredients, call the family, and create a forest of these cheerful, crunchy, and chewy holiday treats. Your taste buds and your holiday spirit will thank you!
