DIY Christmas Tree Rice Krispie Treats: A Festive and Fun Holiday Project
The holiday season is synonymous with warmth, joy, and, of course, delicious treats! While elaborate baking projects can be a cherished tradition, sometimes you need a dessert that's both spectacularly festive and wonderfully simple. Enter
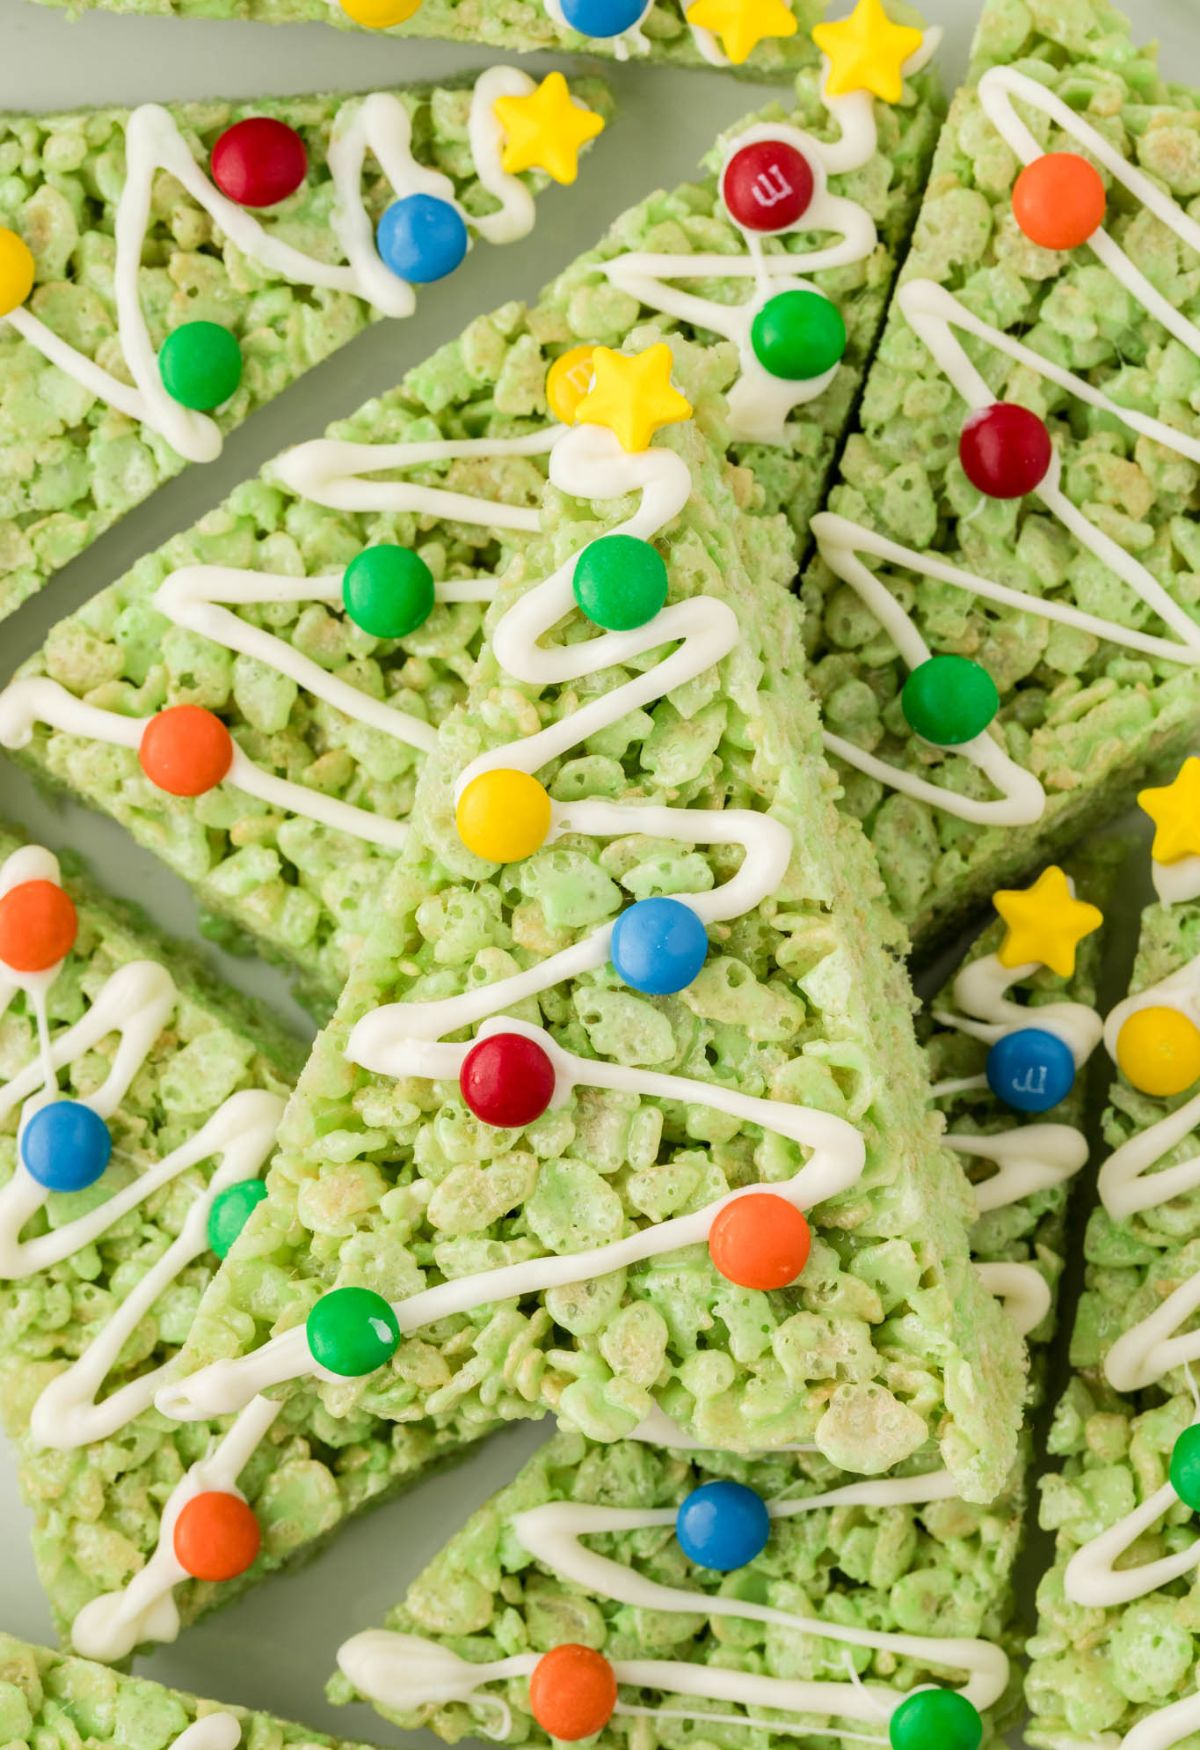
DIY Christmas Tree Rice Krispie Treats – the ultimate no-bake holiday confection that brings smiles to faces of all ages. These delightful, crisp cereal treats, shaped into miniature Christmas trees and adorned with a colorful array of candies, are not just a dessert; they're an engaging activity perfect for family fun.
Imagine vibrant green trees, shimmering with "snow," topped with edible stars, and studded with tiny candy ornaments. These Christmas tree Rice Krispies treats are incredibly versatile, allowing for endless creativity in decoration, making each one a unique edible masterpiece. Whether you're a seasoned baker or a kitchen novice, this guide will walk you through crafting these charming holiday delights, transforming simple ingredients into a festive showstopper.
Why Christmas Tree Rice Krispie Treats Are a Holiday Must-Have
There are countless reasons why
easy no-bake Christmas tree Rice Krispies treats have become a beloved holiday staple. Their appeal lies in a perfect blend of simplicity, festive charm, and interactive fun:
- No-Bake Bliss: One of their greatest advantages is that no oven is required! This makes them perfect for busy holiday schedules, freeing up oven space, and an ideal project for kitchens of all sizes.
- Kid-Friendly Activity: From mixing the sticky marshmallow goodness to shaping the trees and, most excitingly, decorating them, children absolutely adore being involved in every step. It's a wonderful way to create lasting holiday memories.
- Endless Customization: The decorating stage is where these treats truly shine. With a variety of candies, sprinkles, and frosting colors, each tree can be a unique expression of holiday cheer.
- Eye-Catching Presentation: Arranged on a platter, these green, candy-studded trees instantly evoke the spirit of Christmas. They make charming additions to dessert tables, holiday parties, or as thoughtful homemade gifts.
- Quick & Easy: While they look impressive, the actual preparation time is surprisingly short, making them a fantastic last-minute treat option.
Crafting Your Festive Rice Krispie Treat Base
The foundation of any great Christmas tree Rice Krispies treat is a perfectly crisp and chewy base. You have two excellent options for this: making them from scratch or utilizing convenient pre-made bars.
Option 1: Homemade Green Rice Krispie Treats
Making your own batch from scratch gives you complete control over the flavor, texture, and, crucially, the vibrant green color.
What you'll need:
- 4 ⅔ cups Kellogg’s® Rice Krispies cereal
- 10 ounces marshmallows (about 40 regular or 6 cups mini marshmallows)
- 4 tablespoons salted butter (using European butter can add a richer flavor!)
- Green food coloring (gel food coloring provides a more intense color)
- Non-stick cooking spray
- Large bowl and spatula (for mixing)
- Baking tray lined with parchment paper or wax paper
Method (Microwave Version for Speed):
- Prepare Your Workspace: Line a baking tray with parchment paper or wax paper and set aside. Spray a large microwave-safe bowl with non-stick cooking spray, then add your Rice Krispies cereal.
- Melt Marshmallows & Butter: In another large microwave-safe bowl, combine the butter and marshmallows. Heat on high for 1 minute. Stir well until the marshmallows begin to melt. Heat for an additional 15 seconds, then let the bowl sit in the microwave for one minute to allow residual heat to fully melt the mixture. Stir until completely smooth and creamy.
- Add Green Color: Stir in several drops of green food coloring until you achieve your desired festive shade. Start with a few drops and add more gradually.
- Combine & Mix: Pour the melted green marshmallow mixture over the cereal in the prepared bowl. Using a greased spatula, mix very well until the cereal is evenly coated.
- Shape the Trees: Once cool enough to handle (but still pliable), lightly grease your hands with cooking spray. Scoop about ½ cup of the mixture and gently pat it into a ball. Shape it into a rough pyramid or cone to resemble a tree. Place each shaped treat onto your parchment-lined baking tray. You should yield about 12 trees.
- Chill for Firmness: Chill the shaped trees for at least 10 minutes. This initial cooling makes them much easier to refine and shape into perfect Christmas trees. After this, continue shaping as needed and let them firm up completely for about 30-40 more minutes. A firmer base is essential for successful decorating!
Method (Stovetop Version for Control):
- Follow step 1 above for preparing your workspace.
- In a large saucepan, melt the butter over medium-low heat.
- Once about half the butter is melted, add the marshmallows. Continue heating, stirring constantly, until most of the marshmallows have melted. Remove from heat and continue stirring until the mixture is completely smooth.
- Follow steps 3-6 from the microwave method to add green food coloring, combine with cereal, shape, and chill.
Option 2: Using Pre-Made Rice Krispies Treat Bars
For ultimate convenience, you can start with pre-made Kellogg’s® Rice Krispies Treats® Original bars. This is a fantastic shortcut, especially if you're making a large batch or have limited time. For more on this, check out
Christmas Tree Rice Krispie Treats: Easy Homemade & Pre-made Ideas.
Steps for Pre-Made Bars:
- Unwrap each Kellogg’s® Rice Krispies Treats® Original bar.
- Place them on a parchment-lined baking sheet.
- Using a sharp knife, carefully trim the corners of each bar, creating a triangular "tree" shape. You might need to gently press and reshape any loose bits.
Unleash Your Inner Elf: Creative Decoration Ideas
This is where the magic happens! Decorating your
DIY Christmas Tree Rice Krispie Treats is where you can truly let your imagination run wild.
1. The Frosting "Snow" and Garland
Green frosting is key to making your trees look lush and inviting.
- Green Frosting: You can use store-bought tubs of green frosting or make your own buttercream. For easier piping, ensure your frosting is at room temperature and well-stirred.
- Piping Techniques:
- Star Tip Method: For a classic "fir branch" look, use a star-shaped piping tip. Pipe a row across the bottom of each tree, then pipe the next row slightly overlapping the first. Continue until the entire tree is covered.
- Simple Swirl or Zigzag: If you don't have a star tip, a simple round tip or even a plastic sandwich bag with a corner snipped off works wonderfully. Pipe continuous swirls or zigzags to cover the surface.
- Tips for Piping: Don't overload your piping bag. Work from the bottom up. If the frosting seems too stiff, microwave it for 5-10 seconds and stir well.
2. Adding the Tree Trunk
No Christmas tree is complete without a sturdy trunk!
- Miniature Chocolate-Covered Peanut Butter Cups: These are the perfect size and shape. Simply unwrap them and gently press one (upside down) at the bottom center of each frosted tree. If you want a smaller trunk, you can halve them vertically.
3. Fun Candies for Ornaments
This is the most exciting part, especially for kids! The possibilities are virtually endless.
- Multi-Colored Sprinkles: A holiday classic! Gently press an assortment of jimmies, nonpareils, or sanding sugar into the wet frosting.
- Mini Candies:
- M&M's Minis: Great for colorful "ornaments."
- Mini Chocolate Chips: Add a subtle chocolatey touch.
- Silver or Gold Dragees/Balls: For a touch of sparkle and elegance.
- Small Gumballs (cut in quarters): Can add larger, brightly colored "baubles."
- Red Hots or Cinnamon Candies: For a spicy, festive burst of color.
- Edible Glitter: A light dusting can add a magical shimmer.
- Candy Canes: Crush them lightly and sprinkle for a pepperminty crunch and color.
4. The Perfect Tree Topper
A star on top completes the look.
- Star Sprinkles: Edible star-shaped sprinkles are readily available and perfect for this. Gently place one on the very top of each tree.
- Small Candy Stars: Some brands offer small, star-shaped candies ideal for this purpose.
5. Sugar "Snow" Effect
For a beautiful frosted or "snow-dusted" look, a little confectioner's sugar goes a long way.
- Dusted Snow: Using a mesh strainer, lightly dust confectioner's sugar (powdered sugar) over the decorated trees. If you don't have a strainer, take a spoonful of sugar and gently tap it with your other hand over the treats to create a fine dusting.
Tips for Success and Festive Presentation
To ensure your
christmas tree rice krispies treats are not only delicious but also picture-perfect, consider these additional tips:
- Preparation is Key: Always have your parchment paper and non-stick spray ready before you begin melting marshmallows. This prevents sticking and makes cleanup easier.
- Work Quickly: Marshmallow mixtures set fast! Have your cereal and food coloring ready to go so you can mix and shape efficiently.
- Don't Over-Mix: While you want the cereal fully coated, over-mixing can lead to denser, tougher treats. Mix just until combined.
- Gentle Shaping: When forming your trees, press firmly enough to hold their shape, but avoid compacting them too much, which can make them hard.
- Let Frosting Set: If possible, allow the frosting on your decorated trees to set slightly before stacking or packaging them to prevent smudging.
- Storage: Store your decorated christmas tree rice krispies treats in an airtight container at room temperature for up to 3-4 days to maintain their freshness and crispness.
- Creative Serving: Arrange them on a festive holiday platter, use them as edible place settings, or individually wrap them in clear cello bags with a ribbon for thoughtful homemade gifts. They also make a fantastic centerpiece for a "decorate your own dessert" station at a holiday gathering!
Conclusion
DIY Christmas Tree Rice Krispie Treats are more than just a dessert; they're a celebration of holiday cheer, creativity, and togetherness. Their ease of preparation, combined with the endless possibilities for customization with fun candies and festive adornments, makes them an ideal project for families and a delightful addition to any holiday spread. So gather your ingredients, unleash your inner decorator, and create a batch of these charming, delicious
christmas tree rice krispies treats that are sure to bring joy and sparkle to your festive season!